Showing posts with label homemade. Show all posts

Saturday, November 24, 2018

DIY: Three Ingredient Chapsticks


I love good chapsticks. Always have. But long gone are the days where I spend several dollars on "good" chapsticks only for me to lose them a few weeks later and head back to the store for yet another tube. A few years ago I began making my own chapsticks, and there is no going back. Homemade chapsticks are The Bomb. For real. Way better than any store-bought one I've ever used, and get this...they cost me roughly $.50 per tube to make, maybe even less.

When you feel how silky smooth these chapsticks are, and how quick and easy they are to make, I guarantee you'll never buy chapstick at the store again.


Ingredients:

*Bees Wax-I buy the small pellets so they melt more easily (linked is a white organic pellet bag, though I use yellow...I'm not even sure of the difference)
*Shea Butter
*Coconut Oil
*Chapstick tubes 
*Optional: Essential oils (such as lavender or peppermint-make sure to use quality oils, like those from Plant Therapy)

*I do 1/3 cup of each main ingredient to make 50 tubes*


Okay, so you'll have to make a bit of investment your first time making chapsticks, assuming you don't already have any of these ingredients. BUT, an 8 oz. bag of bees wax pellets has yielded 50-75 chapsticks, and it's only half used, so it should last another 50-75. Same goes for the Shea and Coconut Oils. I'm telling you, they are CHEAP to make.

Safety Tip: I would suggest against using lemon, orange, bergamot, etc. as they are phototoxic...and since these will be on your lips, which just so happen to see the sun, you will be regretting that greatly. You can easily google whether or not an oil is phototoxic to be sure you're in the clear. 

The recipe is the simplest ever. You just need a 1-1-1 ratio of the three main ingredients (again 1/3 of each = 50 tubes). In a small pot (preferably with a pour spout on it), melt the bees wax, coconut oil, and shea butter over medium-low heat. Once it's melty, remove from the heat, add a few drops of oil, and get pouring!


I like to line my chapstick tubes up on the counter with the caps off. I always put a tray underneath for the inevitable spills. Pour the mixture into each tube slowly. Allow to cool, place the caps on top, and voila! Chapsticks for the next year, Christmas presents, your children who make yours all gross, or the ten places in your house where you often discover you need chapstick but can't find them. Done and done.

I make a batch of chapsticks once a year. It takes all of 10 minutes, and saves me a bunch of money. Plus, they feel way better than even the best chapsticks that I used to buy at the store. Do yourself a favor and make your own chapsticks.


(Some of the links in this post are my referral/affiliate links.  Read my disclosure policy HERE.  Thank you for supporting the continuation of this blog by using my links!)

Friday, May 22, 2015

DIY Herb Pallet Garden


For Mother's Day/my Mother-in-Law's birthday, the three daughter in laws built her this herb pallet garden.  It was so simple and turned out so cute!  I now need to build one for myself :)

We started with a small pallet.  I then cut spare boards from other pallets, as well as some leftover 1 x 4 boards to fit the bottom of each row and screwed them in.  


We then used chalk board paint to create a writing surface, and stenciled our herb names onto each space.  Soil filled in each of the boxes, and then we planted our herbs!  We included basil, oregano, rosemary, thyme, lavender, and strawberries.  You will need about 1/2-3/4 of a regular sized bag of soil to fill a small pallet like this.  

I loved how simple it was to create, and how cute it turned out!  I can't wait to find another pallet for my own herb garden at home.  


Friday, May 1, 2015

DIY: Farmhouse Style Shelves


We recently moved some furniture around our living room/kitchen space.  We don't have a lot of storage in our small kitchen, so I thought it'd be nice to add some shelving to one of the walls and use Ball canning jars to store things like beans, popcorn, teas, etc.  I love the farmhouse style, and of course love anything DIY and homemade!

We knocked these shelves out in about 3 hours (including drying time).  We spent $36 on brackets, and around $10 for the board (I really can't remember how much it was-this is a general ballpark price).  So, not the MOST inexpensive project (due to needing sturdy brackets so things don't-you know-fall on my children walking by), but overall reasonable for 3 good sized-and good looking-shelves!

We started with a 12 foot long 2x8 board.  A 2x10 would also be a great size for these shelves.  We cut them into three equal pieces.  

For staining, I boiled some water and made a strong brew of black tea.  I wiped this all over each of the boards.  Then, I applied a coat of steel wool soaked vinegar.  This had been sitting already in my garage from another project.  To make this type of stain, you simply soak steel wool (we used the kind with the number: #0000) in a jar of white vinegar.  Be sure to let a little bit of the steel wool to touch the air (i.e. let it stick out a bit) so that it oxidizes.  Occasionally dip the wool back down into the jar, shake, pull out another portion of the steel, and repeat until you have a darkened mixture of vinegar.  24 hours is usually plenty of time.  

When you wipe this mixture on, the wood absorbs it differently in different spaces.  Also, different woods will take it differently.  It's totally out of your control, which I love!  And it darkens over the first few minutes-so if it goes on really light, let it sit and watch it darken!


We let this dry on the boards.  We did not use any kind of finish or poly because they aren't getting any sort of heavy use.  Then we just screwed our brackets into the wall and hung them up.  We originally bought brackets without the middle support bar, and it was a big mistake.  You need brackets with some sort of middle support so that it can hold the weight of the wood plus whatever you're putting on them.

I really, really, love these shelves.  And they were so incredibly easy to make!  They've freed up space in my pantry cabinet so I can see everything better, and give me an excuse to buy more Ball jars :)


(The links in this post may be referral/affiliate links.  Read my disclosure policy HERE.  Thank you for supporting the continuation of this blog by using my links!)


Wednesday, March 11, 2015

DIY Kids Sized Farmhouse Table


Last year, we built ourselves this farmhouse table.  I still love it, though there are definitely things I would do differently next time.  But it’s particularly special because it’s the first big thing we ever made together. 

We are a pretty big family, considering we have four children.  Our table fits us all well, with plenty of room to spare.  And when we have just one other small family over for dinner, we have enough space at our table for everyone.  BUT, if we have another big family over (or multiple families over), we simply cannot all fit at our big farmhouse table. 


I really like our kids to dine close to us, even if they’re not at the same table.  We had a little round table, but it just wasn’t cutting it anymore.  For the full sized table we built, we used this gal's modified plans from Ana White's website (love her!).   We simply scaled down our farmhouse table measurements to make it kid-sized.  It is was so simple to just shorten all the measurements and create a "mini" farmhouse table.  


As always, I found a really cute green "oops" paint from Home Depot for just $.50!!!  I used my Valspar Antiquing Glaze from Lowe's (my absolute favorite!) to give it an older look.  I finished the green areas with low oder polyurethane (I use this kind).


The table top is chalkboard paint.  I like this kind, and it lasts through a ton of projects!  I used 2 coats of chalkboard paint.  You do not put polyurethane on top of the chalkboard paint.  You just leave it as is.  


It's such a fun table and a great way to add extra seating into our kitchen.  We use it all the time.  


It's a perfect sized table for group crafts since they don't have to reach so far across the table, and it's always fun to just draw on it with chalk.  We use it whenever we have lots of people over, and it's a great way for a bunch of kids to be able to sit together and talk while they eat.

I'm so glad we made the decision to build this table.  It was quick and easy, and a really useful piece for our family!

Tuesday, December 16, 2014

How to Create an Elegant Christmas Tree for Less Than $25


(This is a guest post from my amazing friend, Jami.  She's a frugal momma on a mission to have beautiful things in her home.  I think you'll feel inspired by the beauty of her Christmas tree!)

It’s Christmas!  It’s that time of year when it’s actually acceptable to listen to festive music and decorate your house without getting weird looks.  I really wanted to decorate before Thanksgiving this year, but for my husband’s sanity, I decided to hold off until exactly the day after we ate all of that glorious turkey.
I was on a mission this year.  I wanted to re-theme our very boring and generic Christmas tree to fit our home, personality, and likes, plus add some glitz, sophistication, and elegance. I told my husband about my awesome idea, and worry glazed across his eyes.  He said what he was thinking, “How much?” 

I have always wanted to have one of those fantastically gorgeous, boutique style Christmas trees living in my house during the holiday season. I want the beauty, the sparkles, the whimsical and warm fuzzy feelings, and the amazing artistic value a tree like that can bring. But, the price tag has always been a deterrent.  Do you know what I mean here, people? A tree like that can be very expensive!

I gave myself a $25 budget.  I needed to be organized and have a plan of action in order to get the most out of what I had. I wasn’t able to just buy random ornaments that looked pretty.  I needed to know exactly what was needed to accomplish this challenge.  Below are some organized tips and tutorial links that can help you have a fantastically gorgeous, boutique style Christmas tree on a $25 budget! What are you waiting for!?

1. START WITH WHAT YOU HAVE

This first step is key.  Decide what you really want to use from what you already have.  This will allow you to save money and to establish a base for your new elegant Christmas tree theme.


What I Already Had on Hand:
-Small Christmas Lights
-Larger Bulb Lights
-Large Clear Bulb Ornaments
-Large Frosted Bulb Ornaments
-3 Silver Bird Ornaments
-2 Natural Wood Owl Ornaments
-A Pampas Grass Stalk


After I gathered what I already had to use to established my base, I was able to figure out what I needed for my elegant Christmas tree theme.  I wanted to stick with similar colors of what I already had in my ornaments and accents, like silver, brown, and white. I also wanted my theme to incorporate more natural elements with added glitz.


2. WHAT ORNAMENTS/ACCENTS DO YOU NEED TO PURCHASE?

After you’ve established your base of what you already have, now you can figure out what you actually need to buy with your $25 and where to go to get the most out of your budget. 

What I Wanted to Buy:
-New Silver/Glitter Bulb Ornaments
-Large Glittery Ornaments
-Twisty Branches For the Tree Top
-Jute Mesh to Wrap Around the Tree

 Since I only had $25 to work with, I figured I would start at the best place there is, the Dollar Tree.  The Dollar Tree is wonderful for holidays.  The only issue I have come across with this store is that sometimes their products are not always perfectly put together and can sometimes be a little on the cheese ball side.  However, I figured I would check out the ornament section and give it a whirl.  I actually found some pretty great things!

What  I Found at the Dollar Tree:
-2 Packages of Small Silver/Pewter/Glitter Ornaments ($2.14)
-2 Packages of Large Silver/Pewter/Glitter Ornaments ($2.14)
-2 Packages of Twisty Branches Found in the Floral Section ($2.14)
-3 Sets (2 in each package) of Silver Glitter and Rhinestone Snowflake Flowers ($3.21)

All I had left was the jute mesh. I checked out Michael’s since that would be the best bet, plus I had a 50% off coupon good on any regular priced item.  I found a 12” x 19’ roll of jute mesh in the floral section for $9.99  and paired it with my 50% off coupon.  Score!  I would cut the mesh into strips and twist them later on in order to wrap it around the tree.

What I Found At Michael’s:
-1 roll of jute mesh (10.76 - 50% = $5.38)


3. MAKE YOUR OWN ORNAMENTS!
After buying your necessity ornaments and accents for your tree, determine if there is anything else you can add that you can make yourself.  Pick one or two simple projects that won’t stress you out this season.  After all, Christmas is no fun with stress involved.

Ornament Tutorials I Used:


I love creating.  It pours joy into my soul. I wanted to create some special ornaments to go along with my new tree.  I found a few styles that would work well with my theme and would also be inexpensive and simple to make.  Plus my kids were able to get in on glitter action!

Supplies I Purchased For My DIY Ornaments:
-2 Packages Clothes Pins ($2.98)
-1 Package of Glitter ($1.07)


The total cost for my elegant Christmas tree...drum roll please....was a whopping $19.06! That is certainly below my original budget of $25 and is certainly fantastic for this budget savvy girl. 

If you have always wanted a fancy Christmas tree but have been intimidated by cost, there is no need to be any longer.  Enjoy your tree!

Monday, November 24, 2014

DIY Peppermint Extract


About two months ago, I began my first batch of peppermint extract.  Every winter, I enjoy making peppermint marshmallows, peppermint mochas, and other pepperminty things.  I also like to make homemade gifts.  I figured this would be perfect for stocking my cabinets with pepperminty goodness, and for giving as gifts.  

Making your own extracts in incredibly easy.  For the peppermint extract, I bought a huge bottle of Vodka from Costco (under $20).  I then picked peppermint leaves from my front yard.  

So here's how you do it:

You'll need vodka and peppermint leaves.  That's it!


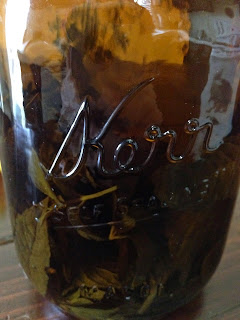
(Your extract will be dark like this ^^ after 4-6 weeks)

Wash leaves, remove stems, and dry them off with a towel.  

Fill a jar with leaves and vodka.  It's important that the vodka fully covers the leaves, or the leaves will get yucky/moldy.  I filled my jars about 1/4-1/3 full of leaves.

Place an airtight lid on your jar, and place the jar in a dark cabinet. 

Every week or so, I would give the jar a quick shake.  

After about 4-6 weeks, the extract should be dark in color (like in my pictures).  

(The really tall jar in the above picture is actually my vanilla extract getting started)

Strain off the leaves, and pour your extract into small containers (or just leave it in a big one if it's all for you!).

Voila!  An easy, frugal, and useful Christmas gift.

I bought little jars at Hobby Lobby for 50% off, so they were about $1.25 a piece.  I'm going to be giving sets of extracts away at Christmas-the peppermint extract, and a vanilla extract, which got started a little later (I used bourbon and vanilla beans for that).

Merry Christmas!


Wednesday, August 20, 2014

Zoe's 5th Frozen Birthday Party

(Thank you to napkins.com for choosing this party as their DIY Party of the Month!)


Our second born, Zoe, turned 5 this month.  FIVE!  How we got to this point so quickly, I'll never know.  Yet here we are, with a beautiful, spunky, independent little girl.  Zoe, like every little girl, loves the movie Frozen.  How could you not?  It's simply amazing.  Her birthday party was OBVIOUSLY a Frozen theme.


We made a "Love is an open door!" sign to hang on our screen door using scrapbook paper from Michael's.


For party favors and party fun, we made these snowflake wands.  Thank goodness for Hobby Lobby stocking a Christmas department in the middle of summer!  We just used blue snowflake ornaments, ribbons, and small wooden dowels to make these (and a hot glue gun to attach the pieces).


We bought shiny white and purple gum balls, and light blue sixlets in the cake decorating section of Walmart and Hobby Lobby.  They went inside mason jars (of course-because they're awesome), and then we added some ribbon around the top.  We also bought blue and white chevron striped straws.  


In honor of Olaf hoping to enjoy summer, we put blue jell-o into clear cups and topped them with umbrellas (Dollar Store).


For food, we had sandwiches.  The little tag next to them reads, "we finish each other's sandwiches."


"Olaf's Noses" and ranch for healthy snack points.


Purple & blue forks/spoons (Walmart) and dipped pretzels in white & blue candy melts.  My pretzel-hating husband thinks these are good.  I'd have to agree, but I also love pretzels.  Anyway, I always do a pretzel dipped in candy melts at our kids parties, and they are always GONE by the end.  So good.


Instead of a cake, we had a "frozen ice cream" bar.  We actually already had all the sprinkles in our cabinet, but we bought jelly beans and gummy worms, as well as chocolate and caramel syrup.  Zoe got to pick out two ice creams at the store.  This was so fun.  I had a couple grown-ups help me with an assembly line to serve the kiddos.


Do you want to build a snowman???  These kids did!  We used toilet paper and cut out black circles and orange triangles.  They teamed up, wrapped a partner, and then stuck their buttons and nose on top!


^^^The birthday girl!  


In total, I spent $117 on this party, which is a little over my target party budget of $100.  But, I have tons of the wands left over that I can perhaps sell online or on etsy, lots of scrapbook paper left over for other projects, some ice cream and most of the syrups left over that will go to my belly, gum balls that I've been using for bribing my kids all week long, and of course the sprinkles are mostly left over too.  

Most importantly, Zoe had fun and enjoyed herself!

Monday, August 4, 2014

Homemade Butter in Jars


We bought this huge container of Heavy Whipping Cream at Costco a few weeks ago for Ben's birthday cake (costs about $4.50 there).  But, of course, we had a ton left over.  So this last week, we made a bunch of butter.  It is seriously the easiest thing ever, and it's a great science experiment for the kids (and grown ups).  Making your own butter this way will actually yield two things: butter and buttermilk.  We used our buttermilk to make buttermilk pancakes with a buttermilk syrup.


To start: All you need is heavy cream.  Fill a jar half full with the cream.  I gave each of my children their own jar.  We used glass, but if you are worried about them dropping it, you may want to use a plastic jar instead.  Tighten the lid on and then start shaking.  


If your kids get tired of shaking, tell them to dance with their jar!


After a few minutes, you'll first notice that the cream is not longer making noise when you shake it.  If you remove the lid to take a peek, you will notice that it looks like whipped cream (see above picture).  Keep on shaking!


A few minutes later, you'll hear a light "thump" as the butter suddenly appears and is separated from the buttermilk (see above picture).  How cool is that!?!  Shake a little while longer.  If you like your butter salted, add a little salt before your final shake.  We use unsalted butter, so we didn't add anything.


Strain the buttermilk away from the butter and store into a separate jar in the fridge.  SO easy, right?  This butter tastes great!  And with only 1 ingredient?  I love it even more.  My kids have asked to make butter a couple more times-they love it.  I usually have to help them shake the jar a bit, especially once the cream turns thick and it's harder to shake it, but it only takes about 5 minutes to make.  This would also be a great project to do when your kids are learning about cows, farm life, food, etc.

Have you ever made your own butter?  

Tuesday, July 29, 2014

Last Week's Homemade Items


I've been slacking lately on the saving money/making things from scratch/planning ahead for meals type stuff.  These are all things I'm really quite good at, so it bothers me when I don't intentionally do those things well.  I HATE having to buy granola bars at the store.  And yet when I don't take the time to make them at home, I end up wasting money on granola bars at the store with ingredients I can't even read.  

This past week, I finally decided that I've had enough, and I got to work.  I planned out my menu for the week utilizing my pantry and freezer.  I went grocery shopping, and then I got started on a few things for the week.  First, I made a batch of granola bars.  These take 5-10 minutes of hands on prep, and 5 minutes packaging them up at the end.  The recipe yields at least 20 bars.


I had recently run out of my Costco sized taco seasoning, and so I made a batch of my own.  I buy my spices in bulk at Winco, which saves an incredible amount of money (if you don't have a Winco, you can buy some bulk spices on Amazon for a decent price, too)!  I tried it tonight on tacos for the first time and it was delicious.


We love yogurt at our house, so the next thing on my list was to start making yogurt regularly again.  I make my yogurt in the crock pot, and it is so easy that it's truly a no brainer for saving money and eating healthy.  Plus, I can make a tub of organic yogurt for just $1.50 (organic milk here in NV at Costco is $6/gallon, and I make 4 cups of milk at a time into yogurt).  


A new thing for my list this week was to make and can my own BBQ sauce.  I followed these directions here to make a double batch of BBQ sauce.  Her recipe calls for a 14-Spice rub mix, so I made that, too (which I used on chicken a couple one night this week-tasty!).  My BBQ loving daughter Zoe gave this recipe a thumbs up.  I was able to can 5 jars of this using a double batch (plus a small jar for the fridge).  I gave one away to a friend this week, and have the others in my cabinet.


Lastly, I started some peppermint extract. I use a ton of this in the winter, and I figured it would also make a great gift.  It's so easy, too.  It's just peppermint leaves and vodka.  It's sitting up high in a cabinet right now and will stay there for another month or two.  I have a huge peppermint plant in front of my house that I used for this.  

Next week, I plan to harvest more peppermint from my plant and dry them out to make tea for the winter.  Since the plant is going strong right now, we just use fresh leaves for peppermint tea.  Peppermint plants grow like crazy.  I planted this one two years ago and it was just a tiny thing.  I've harvested pretty big chunks off of it maybe 10-12 times this summer already, and it's even bigger than it was earlier this spring.  I should be able to get plenty of tea leaves out of it...perhaps I can also give homemade tea leaves for Christmas!

What things have you been making this week?


Monday, July 7, 2014

DIY Maxi Skirts for Kids


I recently fell in love with the Maxi Skirt.  Well, actually I fell in love with them last year, but I never bought or made myself one until this summer.  I bought my first one, and then debated over how many days in a row was too many to wear it.  Turns out the answer is 4.  

I remembered pinning some maxi skirt tutorials on good ol' Pinterest, so I hunted them down, and then ordered some fabric.  


Jersey knit fabric can be quite pricey at the store, and I am quite frugal.  I kept hearing about this magical online fabric store called Girl Charlee.  Let me tell you, it is indeed magical.  I bought 2 yards each of purple and yellow chevron jersey knits.  Each set of 2 yards was enough to make 1 skirt for me, and 1 skirt for my girls.  The fabric was $6/yard.  So, I spent $25ish for 2 skirts for me (a long and a knee length) and 2 skirts for my girls (a long and a knee length).  We have enough of the yellow left over to make some American Girl doll skirts, too.  I will say, though, that the quality of fabric is not as nice as the one I bought from Maurices (which cost me $30).  BUT, for the price (which was a fraction of the cost), I personally think it was totally worth it, and I will be buying more soon.


I followed the tutorial HERE for the skirts.  I followed the same instructions for my girls skirts, with smaller measurements.  I found that while the figures for the waist for a grown up (measure your waist, divide by 2, add 1) were about perfect for me, it was not for my girls.  I ended up taking them both in at least an inch...not too difficult, just fold the top band back out, zig zag stitch it tighter, and then fold it over again...you won't even notice it when they are wearing it.  I reduced the thickness of the waist to 10" on the girls skirts.  For the shorter skirts, I followed the same directions, simply reducing the length of the skirt.  

Aren't they the cutest little maxi skirt models ever?


Friday, June 13, 2014

Cherry Picking Day and What I Made

My 3 year old picking cherries with me.
My Mother-in-Law's cherry tree is exploding with beautiful cherries this year.  My kids spent Sunday through Wednesday at her house this week, and so that gave me two opportunities to pick tons of cherries (drop-off and pick-up).  I brought home 4 gallon bags full of cherries the first time, and a 2 1/2 gallon bucket full the second time.  And seriously, people, my heart was so happy.

My 4 year old "pitting" cherries after I picked them up.
I had so many cherries and I wanted to try so many things.  I have never owned a Cherry Pitter before, and actually I had no idea these things even existed until I searched for it online.  I bought this one in red.  It works wonderfully, and it is small enough to store easily in my already over-crowded drawers.  Both of my girls took turns pitting the cherries, too, as it is a pretty safe little tool.


Maraschino Cherries

On Monday, I made maraschino cherries (did you know commercial maraschino cherries are soaked in bleach-yuck!).  I just spent 5 minutes searching Pinterest for this recipe to share with you all until I realized that I had actually pinned it.  Geez.  I think I need more sleep.  Anyway, I used this recipe for my cherries, and I used concord grape juice instead of cherry juice because of the cost.  These are amazing, and the juice is tasty and perfect to use in Shirley Temple drinks.  I canned three tiny jars, and one large jar using these directions.  If you are looking to try canning, and don't want to spend a lot of money, I bought this kit for just $15 and used my own large pot for the hot water bath.  I'm sure the fancy equipment and pots would be nice, but this is some great starter equipment.


Then I moved on to the pie filling.  In total, I made 3 batches of 5 cups each (enough for 3 pies).  I used this recipe (this lady's pictures are amazing, don't you think?).  I froze two batches, and put the third in a jar in the fridge to be used this weekend. 


I made three jars of cherry jam using this recipe.  I also canned these, though we are already flying through our first jar!  SO delicious.


Finally, I made some popsicles for the kiddos using 1/2 cup leftover grape juice, 1/2 cup chopped cherries, and 1/2 cup chopped strawberries.  Above is the picture of all my final goods ;)

I'm super proud of myself for spending time making all of these and actually canning some things all on my own!  My fingertips were brownish for a couple days from pitting all those cherries, though!

Have you ever made anything with fresh cherries?  Are any fruit trees ripening where you live?

LinkWithin

Related Posts Plugin for WordPress, Blogger...