Showing posts with label christmas. Show all posts

Thursday, December 3, 2020

New Products for Teachers and Homeschoolers!

 I've been adding some new products to my Teachers Pay Teachers store this week, and have quite a few more planned throughout the month of December. Most all are for preschool aged students, though some are for older students or for teachers and their classrooms, as well! Check out the new ones so far: 


ABC Recognition coloring pages/worksheets. Contains letters A-Z, as well as long vowel pages! Perfect for preschool, pre-k, and kinder students!


Nativity Bingo. I am SO excited about this product. Levi (my 7 year old) keeps asking to play, so this is on my agenda for today with ALL my kids (ages 7-13). I mean, who doesn't love Bingo?!? Contains 9 pages with beautiful nativity and winter pictures. 


What's Missing? This set contains 24 pages for preschool and kindergarten aged students. Various pages with missing beginning letters, missing vowels, or missing ending letters. 


Monkeys Classroom. This resource is for preschool teachers or preschool centers. Thematic posters, letters, signs, home notes, and more for teachers using a "Monkey" theme in their classroom. 34 pages. This set will soon be duplicated for many more of the common animal classroom themes used in preschools and childcare centers! If you have particular animal themes at your center that you would like me to produce, send me a note!


I've been having so much fun creating these resources, and I hope you enjoy them too!


Tuesday, December 16, 2014

How to Create an Elegant Christmas Tree for Less Than $25


(This is a guest post from my amazing friend, Jami.  She's a frugal momma on a mission to have beautiful things in her home.  I think you'll feel inspired by the beauty of her Christmas tree!)

It’s Christmas!  It’s that time of year when it’s actually acceptable to listen to festive music and decorate your house without getting weird looks.  I really wanted to decorate before Thanksgiving this year, but for my husband’s sanity, I decided to hold off until exactly the day after we ate all of that glorious turkey.
I was on a mission this year.  I wanted to re-theme our very boring and generic Christmas tree to fit our home, personality, and likes, plus add some glitz, sophistication, and elegance. I told my husband about my awesome idea, and worry glazed across his eyes.  He said what he was thinking, “How much?” 

I have always wanted to have one of those fantastically gorgeous, boutique style Christmas trees living in my house during the holiday season. I want the beauty, the sparkles, the whimsical and warm fuzzy feelings, and the amazing artistic value a tree like that can bring. But, the price tag has always been a deterrent.  Do you know what I mean here, people? A tree like that can be very expensive!

I gave myself a $25 budget.  I needed to be organized and have a plan of action in order to get the most out of what I had. I wasn’t able to just buy random ornaments that looked pretty.  I needed to know exactly what was needed to accomplish this challenge.  Below are some organized tips and tutorial links that can help you have a fantastically gorgeous, boutique style Christmas tree on a $25 budget! What are you waiting for!?

1. START WITH WHAT YOU HAVE

This first step is key.  Decide what you really want to use from what you already have.  This will allow you to save money and to establish a base for your new elegant Christmas tree theme.


What I Already Had on Hand:
-Small Christmas Lights
-Larger Bulb Lights
-Large Clear Bulb Ornaments
-Large Frosted Bulb Ornaments
-3 Silver Bird Ornaments
-2 Natural Wood Owl Ornaments
-A Pampas Grass Stalk


After I gathered what I already had to use to established my base, I was able to figure out what I needed for my elegant Christmas tree theme.  I wanted to stick with similar colors of what I already had in my ornaments and accents, like silver, brown, and white. I also wanted my theme to incorporate more natural elements with added glitz.


2. WHAT ORNAMENTS/ACCENTS DO YOU NEED TO PURCHASE?

After you’ve established your base of what you already have, now you can figure out what you actually need to buy with your $25 and where to go to get the most out of your budget. 

What I Wanted to Buy:
-New Silver/Glitter Bulb Ornaments
-Large Glittery Ornaments
-Twisty Branches For the Tree Top
-Jute Mesh to Wrap Around the Tree

 Since I only had $25 to work with, I figured I would start at the best place there is, the Dollar Tree.  The Dollar Tree is wonderful for holidays.  The only issue I have come across with this store is that sometimes their products are not always perfectly put together and can sometimes be a little on the cheese ball side.  However, I figured I would check out the ornament section and give it a whirl.  I actually found some pretty great things!

What  I Found at the Dollar Tree:
-2 Packages of Small Silver/Pewter/Glitter Ornaments ($2.14)
-2 Packages of Large Silver/Pewter/Glitter Ornaments ($2.14)
-2 Packages of Twisty Branches Found in the Floral Section ($2.14)
-3 Sets (2 in each package) of Silver Glitter and Rhinestone Snowflake Flowers ($3.21)

All I had left was the jute mesh. I checked out Michael’s since that would be the best bet, plus I had a 50% off coupon good on any regular priced item.  I found a 12” x 19’ roll of jute mesh in the floral section for $9.99  and paired it with my 50% off coupon.  Score!  I would cut the mesh into strips and twist them later on in order to wrap it around the tree.

What I Found At Michael’s:
-1 roll of jute mesh (10.76 - 50% = $5.38)


3. MAKE YOUR OWN ORNAMENTS!
After buying your necessity ornaments and accents for your tree, determine if there is anything else you can add that you can make yourself.  Pick one or two simple projects that won’t stress you out this season.  After all, Christmas is no fun with stress involved.

Ornament Tutorials I Used:


I love creating.  It pours joy into my soul. I wanted to create some special ornaments to go along with my new tree.  I found a few styles that would work well with my theme and would also be inexpensive and simple to make.  Plus my kids were able to get in on glitter action!

Supplies I Purchased For My DIY Ornaments:
-2 Packages Clothes Pins ($2.98)
-1 Package of Glitter ($1.07)


The total cost for my elegant Christmas tree...drum roll please....was a whopping $19.06! That is certainly below my original budget of $25 and is certainly fantastic for this budget savvy girl. 

If you have always wanted a fancy Christmas tree but have been intimidated by cost, there is no need to be any longer.  Enjoy your tree!

Monday, December 15, 2014

Simple & Sweet Christmas Gift for Teachers


My friend Kirstin posted this picture of her gifts for her son's teachers last week on Facebook and I just loved it!  This would be a very cute, practical (hello, chocolate and paper!), and easy gift to whip up this week if you haven't yet got around to getting the teachers in your life a gift yet.  


She found these adorable clipboard/notepad/pen sets at Michael's for just $3.  She bought them over a couple trips using a 50% of coupon, so in the end she paid just $1.50 each.  What a deal!


She paid $23 for a 6 pack of these delicious Hawaiian Host Chocolates from Sam's Club.  Everyone loves chocolate, right?


Then she attached this adorable ribbon, and let her son pick out a name tag sticker for each one.  


Thursday, December 4, 2014

Melissa & Doug Products Half Off Today!!!


Amazon's Deal of the Day is 50% Melissa and Doug Products.  They have some great items for cheap today!  Melissa and Doug products are great because they are high quality, but they are expensive if you don't get them on sale.  My favorite of all the toys offered is the above pictured Shape, Model, and Mold set.  It's perfect for play dough, and will keep your kids from always grabbing the kitchen rolling pin!  Today, it is $9.99 instead of $19.99.  


Blocks like these are a favorite open-ended toy.  My son, especially, enjoys all things blocks.  These are normally $69.99, but today they are $34.99.


Isn't this wood car carrier cute?  I especially appreciate that it's not plastic like all the other toys were generally accumulate.  It's so unique!  Today it's $9.99 instead of $19.99.


Dress ups aren't just for Halloween!  We have quite a few dress ups in our house.  They are a favorite among my children and their friends.  This fire chief costume set would be a perfect gift for a young child.  And the jacket is machine washable!  It is $14.99 today instead of $29.99.


We actually already own these puzzles.  They are my favorite for kids ages 3-5.  They all have little pegs to grab the puzzle pieces out easily for little hands (great for fine motor skills!), and the ABC puzzle is a favorite for letter and sound recognition.  Today, this 3 pack of puzzles is $9.99 instead of $19.99.  


These deals are all good through today or until they sell out (sometimes that happens earlier than the end of the day!).  


(The links in this post are my referral/affiliate links.  Read my disclosure policy HERE.  Thank you for supporting the continuation of this blog by using my links!)

The Gingerbread Man-Christmas Book Activities


December 1st means that the Christmas/Winter book bin comes out from hiding.  We have so many great Christmas and winter themed books, and I always look forward to reading my favorites with the kids.

Today we read (among many others) The Gingerbread Man.  I love this version, and I especially appreciate the art work.  My kids always enjoy the little chant, "run, run, as fast as you can, you can't catch me, I'm the gingerbread man!".  Anyway, you can't read The Gingerbread Man without making gingerbread cookies.


Fortunately, the back of this version of The Gingerbread Man has an easy little recipe to follow.  And double bonus, I found some great molasses at the Dollar Store a few weeks back and had the foresight to buy it for December :)


The hardest part was putting the dough in the fridge to chill for an hour (and then listening to my children incessantly ask if it was ready for an hour).


These cookies were SO delicious!  And cute, of course.  Minus the last batch, which I totally burned because I left the room and didn't hear the timer.

Happy December!

Monday, December 1, 2014

Advent Activity Ideas


Still looking for something easy and meaningful for an advent calendar this year?  Last year I created this advent activity idea sheet, and it was so much fun for our whole family.  We didn't do all of them, but we did and tried a lot of things that we wouldn't have done otherwise.  

The post contains a FREE downloadable .pdf file so you can do these fun activities too!  

Head HERE to get the link for downloading!

Monday, November 24, 2014

DIY Peppermint Extract


About two months ago, I began my first batch of peppermint extract.  Every winter, I enjoy making peppermint marshmallows, peppermint mochas, and other pepperminty things.  I also like to make homemade gifts.  I figured this would be perfect for stocking my cabinets with pepperminty goodness, and for giving as gifts.  

Making your own extracts in incredibly easy.  For the peppermint extract, I bought a huge bottle of Vodka from Costco (under $20).  I then picked peppermint leaves from my front yard.  

So here's how you do it:

You'll need vodka and peppermint leaves.  That's it!


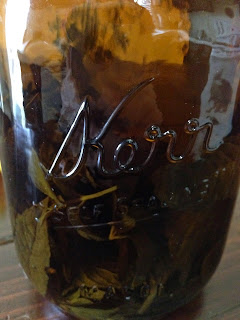
(Your extract will be dark like this ^^ after 4-6 weeks)

Wash leaves, remove stems, and dry them off with a towel.  

Fill a jar with leaves and vodka.  It's important that the vodka fully covers the leaves, or the leaves will get yucky/moldy.  I filled my jars about 1/4-1/3 full of leaves.

Place an airtight lid on your jar, and place the jar in a dark cabinet. 

Every week or so, I would give the jar a quick shake.  

After about 4-6 weeks, the extract should be dark in color (like in my pictures).  

(The really tall jar in the above picture is actually my vanilla extract getting started)

Strain off the leaves, and pour your extract into small containers (or just leave it in a big one if it's all for you!).

Voila!  An easy, frugal, and useful Christmas gift.

I bought little jars at Hobby Lobby for 50% off, so they were about $1.25 a piece.  I'm going to be giving sets of extracts away at Christmas-the peppermint extract, and a vanilla extract, which got started a little later (I used bourbon and vanilla beans for that).

Merry Christmas!


Thursday, March 27, 2014

Guest Post: "Ditch the Stuff, Gift the Experiences"


I'm on the Reno Moms Blog today sharing about how we said "goodbye" to less stuff this past Christmas, and "hello" to some new experiences.  

"My three older children (6, 4, 2) are just finishing up their Christmas gift.  But instead of saying goodbye to a toy (i.e. throwing away a broken toy, replacing batteries for the umpteenth time, or putting something away in the garage because I’m sick of tripping on it), my children are saying hello to some new skills and are happily doing cartwheels and somersaults and hand stands in the living room.  You see, this year, we said “no” to the stuff and “yes” to the experiences.   They each received three months of gymnastics lessons (one month from us, and one month from each set of grandparents).  They did receive some other small things to open up, but it was much less than previous years...."

Click HERE to read the rest of the post and get some ideas for your own "experience" gifts. 


Wednesday, January 8, 2014

Spice Rubs: Easy Gift Idea


I love these spice rubs because they are so easy to whip up, are great for a frugal budget, and are a practical gift idea.  My kids each took turns helping me whip up a few batches of these this past Christmas.  These are great for BBQ meats!

Here are a few recipes you can try.  Just mix all the ingredients together, and store in a small jar!


All Purpose Spice Rub

2 TBS + 1 tsp sea salt
2 TBS packed brown sugar
2 TBS paprika
1 TBS black pepper
1 TBS dried thyme
1 TBS dried oregano
3/4 TBS cayenne pepper


Creole Rub

2 1/2 TBS smoked paprika
2 TBS sea salt
1 1/2 TBS garlic powder
1 1/4 TBS cayenne pepper
1 TBS onion powder
1 TBS black pepper
1 TBS dried thyme
1 TBS dried oregano


Sweet & Spicy Paprika Rub

3 1/2 tsp paprika
3 TBS packed brown sugar
3 tsp sea salt
1 tsp ground cinnamon
1 tsp ground ginger
3/4 tsp cayenne pepper
1/2 tsp garlic powder


These recipes each fill one small Ball jar.  To make your jar look pretty, place your lid on top of the jar, place a square piece of fabric or an upside down cupcake liner on top, and then put the band on and secure.  Tie with a ribbon and label with a tag.


Friday, December 20, 2013

Peppermint Crunch Fudge


For Thanksgiving this year, I tried out this "easy" fudge recipe.  It had one layer of chocolate, and one layer of peanut butter.  It seemed like every recipe I found on Pinterest used the microwave and a mixture of chocolate and sweetened condensed milk for the layers.  Genius and so simple!  Then I saw this peppermint fudge idea on Pinterest via Six Sister's Stuff, and it was basically the same concept but on the stove and with three layers.  Since I clearly lack the ability to properly melt chocolate on the stove, I went for the super easy microwave version again :)

You will need:

*2 cups dark chocolate chips
*2 cups white chocolate chips
*1 bag (10 oz) candy cane hershey kisses
*1 can (14 oz) sweetened condensed milk, divided
*Crushed candy canes (optional)

To make it:

*Line a 9x9 inch baking pan with foil and grease it with butter or a non stick spray.

*In a microwave safe bowl, melt the chocolate and half of the milk.  Put it in the microwave for 30 seconds at a time, stir, and repeat until smooth and melty.
*Pour chocolate mixture into the pan.  Refrigerate.

*Pour white chocolate chips and the other half of the milk into another bowl.  Microwave at 50% power for 30 seconds at a time, stirring, and repeating until melty.
*Pour this layer over the chocolate layer and quickly spread it evenly.  Refrigerate.

*Melt candy cane hershey kisses for 30 seconds at a time until melted.
*Pour over the top of the white chocolate layer.
*Pour crushed candy canes over the top before it hardens.

*Refrigerate until firm.  Cut and serve.


We brought half of this batch to our local firefighters (along with a few other homemade goodies), and I sent the other half to work with Ben the next day.  Peppermint and chocolate are one of my favorite combos, and fudge is one of my favorite holiday treats, so I absolutely LOVED these.  

French Number Pillows


I made these french number pillows for my mom this year for Christmas.  I wish I were a better photographer, but, hey, at least I have something to show you.  I love DIY and homemade gifts.  I've been busy with my four little people, so I really didn't get to make as many homemade gifts this year.  This was one of only a few :)
   

I started with 1 yard of duck cloth.  Is duck cloth the same as canvas?  I'm sure thinking so, because it looks exactly the same to me.  Anyway...you'll need:

 1 yard duck cloth/canvas in tan
 1/2 yard in dark brown
1 regular sized bed pillow
Fabric Fusion (or some sort of fabric glue)
Thread
Pins
Sharpie

That's all you'll need for this project.  Since the fabric was on sale, I only spent $8.50 on both pillows!

Start by cutting up your pillow into the sizes you want.  With my regular sized pillow, I was able to cut one square and one smaller rectangle.  Sew them back shut after cutting.


Then, using your pillow as a guide, wrap the canvas all the way around your pillow.  Add about 2 inches in length and about 1 inch in width.  You are making an "envelope" style pillowcase (see mine folded in the picture above).  Then, turn it inside out and sew along the length of each side.  Do not sew the envelope space shut, as you'll need to stick your pillow in through that slot.  Turn it right side out, and put your pillow in it. 


Now you'll need to seal that opening shut.  This does not have to look "pretty" as you will cover it with your brown strip of fabric.  I used fabric tac and pins until it was dry (see above).  Remove pins once dry.  


Next, measure a strip of the brown fabric for the width you'd like around your pillow.  Be sure to add about an inch to the width for hemming, and a half inch to the length for overlap.  I again used Fabric Tac and pins to hem the brown strip along the sides and one end.  I also used a heavy book to keep them hems pressed together while drying.

Once the hem is dry, position and wrap it around your pillow to cover the back hem.  I again used the Fabric Tac and pins, as well as a heavy book on top to seal the brown to the tan.  Allow it to dry fully before removing the pins.  Add more Fabric Tac, if necessary, to any spots not sealed.  


Next, find a font that you like.  I just googled "French Fonts" and picked one that I liked.  Print out the numbers and matching spellings that you like.  I chose 2 & 9.  

The most difficult part is then cutting out the letters from your print outs.  The letters were so small and tricky to cut out well.  

Once they are cut out, trace them onto your pillow using a Sharpie.  I used a fine point Sharpie for tracing it on, and then a regular Sharpie for filling it in (except in the smaller spaces).  


I think they turned out well!  I would probably sew the pillow cases a bit tighter next time so there's not as much looseness around the sides but overall, I love them!

Wednesday, December 11, 2013

DIY Wrapping Paper


   One of our Advent Activities this year was to make our own wrapping paper.  It's very simple to do.

You will need:

*Brown postal paper (Dollar Store)
*Paint
*Cookie cutter shapes

What to do:

*Unroll a portion of the brown paper 
*Tape corners down to prevent it rolling it back up
*Dip cookie cutters into paint and then press to paper
*Allow to dry before rolling it back up or using it


My kids did red paint with stars, snowflakes, and gingerbread men.  They also did white dots using the eraser of a pencil.  

Later this week they are going to make some more paper using green paint and Christmas trees.

This is a creative and frugal way to make your own wrapping paper, and it's great even for little hands.

Tuesday, December 10, 2013

No Sugar Holiday Cranberry Sauce


Cranberry sause was always a holiday favorite of mine growing up.  I only liked the "jellied" kind, and thought people who ate the chunky kind were so strange.  Then a couple years ago I tried making my own.  Not only did I discover that I loved hot cranberry sauce, but I discovered that the "chunky" kind was so amazingly delicious.  I have not bought canned cranberry sauce since that discovery.  

Typically, you would add sugar into a cranberry sauce recipe, but since I don't like all that unnecessary sugar, I use honey instead.  Here is the simplest (and most delicious) cranberry sauce you will ever make:

You will Need:

1 (12 oz) bag of cranberries
1 cup orange juice (from a container or juice your own)
1/2-3/4 cup honey (adjust to your tastes)
Dash or two of cinnamon

*Put all ingredients into a medium pot and turn the heat to medium high.
*Cook, stirring occasionally until you begin to notice the cranberries "popping"
*Once most of the cranberries have "popped," turn the heat down to low and cook for another 5 minutes.  
*Remove from heat and allow to stand.  The mixture will continue to thicken as it stands.

You can serve this warm (which is so good), or refrigerate it until it's nice and cold before serving.

Monday, December 9, 2013

Christmas Shape Lace & Trace


These Christmas themed lace & trace cards are super easy to make!  


2 Ways to Make:

*Cut out shapes on construction paper.  Decorate if desired.  Laminate (I have this laminator).  Punch holes.  

OR

*Use old cereal boxes to cut out Christmas themed shapes.  Punch holes.

How to Use:

Lace and trace cards can be used to... 

1) lace with string (any string works)
2) Trace around the outside onto a sheet of paper

If your child traces the shapes, she can then decorate her page with markers, crayons, pompoms, ribbons, etc.

Older children can try to lace different patterns around the card such as up and down lacing or lacing around the outer edges of the cards.


These cards are great for fine motor skills practice!

Saturday, November 30, 2013

Christmas Advent Activities


This year, instead of a candy advent calendar, our family will be doing an activity advent calendar.  I'm super excited about these activities.  I've included more than just 24 activities on this list in case we decide that we don't want to do a particular one.  Want to join us in some December fun?  Here's our list this year.  This is a printable pdf so you can print it out, too!

Click below to get a copy of my Christmas Activity Advent Calendar.

CLICK HERE: Christmas Advent Activities

Tuesday, November 12, 2013

Walmart-The Happiest Place on Earth (Especially on a Holiday with Four Kids in Tow)


See these pretty little burlap stockings?  I'm making them for my family.  I'm mimicking some that I saw on Etsy, but instead of paying $130-150 for all six, I'll be spending less than $10 total.  

I bought all these cute little ribbons and embellishments (all at Walmart for super cheap), but originally neglected to buy some fabric glue (like liquid stitch or fabri-tac).  Not to worry, though, I had some at home.  Oh wait, it turned out to be three years old and all dried up.  

So.  Since I needed some other necessities, too, (how is it that we always run out of everything at the same time?), I decided to load up all four children and head out to good 'ol Walmart!  It's really like the happiest place on Earth, you know.  Especially on holidays.  With four kids.  Give it a try some time.  

Once arriving at Walmart with my circus children, I headed straight for the fabric department and before doing anything else, I grabbed my fabri-tac stuff.  Except not that brand.  Because it was at least $3 more expensive than the cheaper brand they sold which had all the same verbiage advertised on the front.  And I'm frugal.  Anywho, in the cart it went.  

We moved onto the baby department: binkies (my dog keeps eating them and the ones he doesn't get to I seem to conveniently run over with the car), baby bath wash, baby lotion, baby powder.

Then we grabbed dog food, oohed and ahhed over the fish, and headed to grab food groceries.  

Ellie spent 5 minutes deciding if she wanted purple or pink frosting for her birthday party cake, and we headed to the register (let me inform you that it was decidedly pink before hitting the cake aisle, and still ended with a "pink" decision after a 5 minute deliberation).  

It was a holiday.  This means that although every line is ridiculously long, they put up the "Lane Closed" signs faster than Aaron can eat a handful of jelly beans.  So we waited patiently, bought our groceries, loaded up the cart, made it to our car, and headed home.

This is where the kids all uploaded the bags and put stuff away like good little helpers, and I searched only for my fabric glue stuff.  Only it wasn't there.  And it wasn't put away in the cabinets and it wasn't put away in my bathroom.  

Checked the receipt..nope.  Not on there.  Seriously?  Seriously?  No, really....seriously!!!!  Of course this happens to me. 

And so, my friends, guess what I'm not working on today?  My stockings.  

Friday, November 1, 2013

Why I Can Finally Buy Christmas Stockings


Last week, I gave birth to our fourth and final baby.  Four kids in six years.  I'm 27 years old and done having babies.  And by "done" I mean "I don't ever want to be pregnant again."  I loved being pregnant and having babies, but I found that my grace for that season of life dissipated very quickly as my little Levi entered the world last week.

And although I feel so "done," I really feel happy.  We've always wanted four children.  I've always had this feeling in the back of my mind that my family was not quite complete.  I was obviously thankful for my children and definitely enjoyed life with each of them (life with our three was actually quite easy-going and fun), but it just felt like someone was missing.  

It may seem totally silly, but I've never bought or made Christmas stockings.  I didn't want to have "different" ones when the final members were added.  After waiting almost 9 years, I'm getting stockings this year, and I'm so excited about it.  I don't even know what I want them to look like, but they will be awesome.  

All six of them.  

Hanging over my fireplace.  

With each person's name.

They will be complete.  

No one missing.

And my heart is happy and full and thankful and so in love with my husband and children.

LinkWithin

Related Posts Plugin for WordPress, Blogger...